Let me first say that there are many great different techniques for creating ombre effects, and this is just one method that I use. However I have noticed that there are still many colourists asking about ombre techniques so I thought I would share some photos from earlier today. Enjoy!!!
YOU WILL NEED:
- Combs
- Sectioning Clips
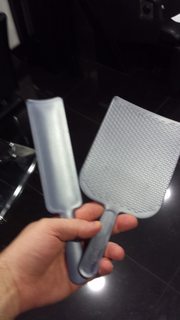
- A Balayage Paddle
- Cling Film
- Tint Brushes (I like brush with softer bristles, one 1.5" wide and a thinner one for the finer highlights.)
- Prelightner mixed to a smooth paste (I use L'Oreal Platium Plus + 20 vol in a 1:2 ratio) It should be smooth but NOT runny, and the lightener should not dry out too quickly, or swell too much.
PREPARATION:
The colour placement should work with the clients natural hair texture, curl pattern, and partings. Take the time to correctly analise the clients hair and visualise you end result.
Working with the natural parting, section the front from the back by taking partings from where the head begins to to curve at the crown, to the ears on both sides.
Take two diagonal partings at the nape, about 2 - 3 cm deep, depending on the hair thickness & density.
APPLICATION:
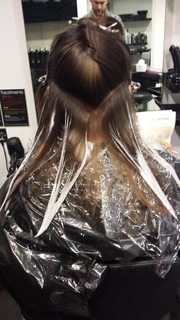
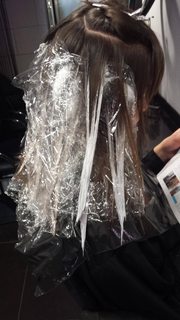
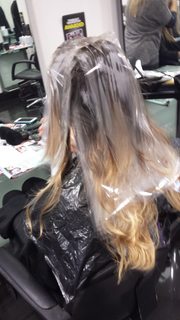
Apply some prelightener to your paddle, and take a section 1 - 2" inches wide and hold the hair out with firm tension and begin applying the lightener to the mid-lenghs of the hair, the turn your brush vertically and sweep the lightener up the hair strand in a 'v' shape to create a soft blend. Up untill this point the lightener should only be painted on the surface on the hair strand. Finally lay the ends of the hair on the paddle and saturate them with lightener. It is very important that ONLY the ends are saturated to create a graduation of colour and to avoid stripy results. The hair should have an evan coating of lightener, so that the hair underneath cannot be seen.
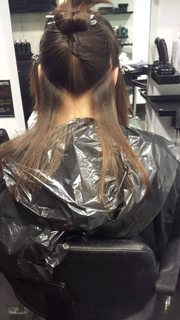
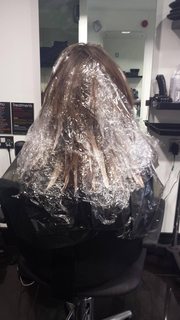
Cover the section in cling film to prevent the lightener fron drying out, and to keep your sections seperated.
Keep working up the hair in diagonal partings. The great thing about painting freehand is that you can vary the size and thickness of the sections as you wish. I did not want the end result to look solid on the ends so I left some hair uncoloured inbetween the sections that I painted.
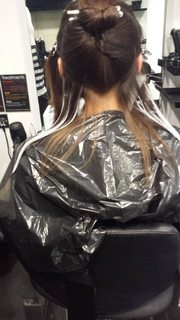
As you work up the head, you may want to take smaller sections of hair.
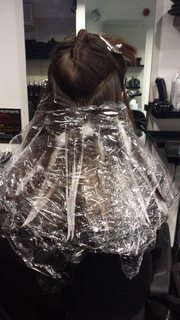
Once the back is complete move onto the side sections. The hair is typically finer at the sides so I am more delicate with the application.
FINAL APPLICATION:
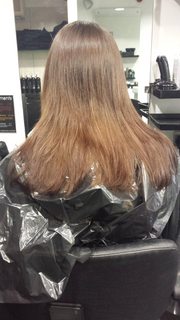
Rinse out each section, once the required lift is achived and finally tone the hair.
In this case I rinsed the colour at a level 8 yellow undercoat, and toned the hair using Dialight, 2 parts 7.23 + 1 part Clear + 6 vol, for 5 minutes.
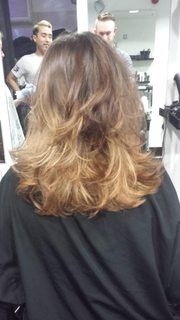
BEFORE & AFTER:
We were both pleased with the result and in real life the blend is softer that it looks in the photo.
If this helps just one person with their ombres, then I would be very happy, and I look forward to seeing everyone elses techniques - lets share & learn from each other!
") edit:
edit: I have edited the image links, being on mobile, I had no idea how big they were - thanks Noodle x